This blog post on Running a Pull Plan Meeting is a summary of one lesson in our online training course, The Lean Builder Master Class.
It’s finally time to run your first pull plan meeting. You’ve laid the groundwork to ensure all the trade partners understand the goals and expectations and have confirmed attendance. Everyone is in the room and ready to go.
Pull Plan Meeting Tips
Let’s go over some pull plan meeting tips.
- Take the time to let everyone introduce themselves first by using an icebreaker to kick things off. Go around the room and make sure every person in that room knows who everyone else is. This will help as you get into discussions later in the pull planning session and make sure they understand who the electrical trade partner is, who the plumbing trade partner is, and so on. Granted some of those Last Planners may know each other from the daily huddles, but some of the project managers may not know who everyone is.
- The facilitator needs to find out who has previous experience with a pull planning meeting. The easiest way is to poll the room and ask for a show of hands. If you identify that someone hasn’t had any experience with a pull plan, this will give you a good indicator that you may need to spend a little extra time for some of those team members who may be newer to the process.
- The facilitator needs to explain what pull planning is and what the goal is for the day. This step ensures that everyone understands the expectations, the milestone that we are getting ready to validate, and what it looks like as we work back to validate that chunk of time. You want to ensure the trade partner or foreman understands the value and the “why” behind the pull plan concept. This is their opportunity to get some buy-in into the schedule, and this is you treating them as an equal partner.
The facilitator is going to emphasize the goals for the session to:
-
- Ensure everyone is onboard to participate in a collaborative nature;
- Ensure that commitments can be made to one another on the tasks, durations, and handoffs effectively;
- Optimize flow and make sure that everyone is bought into the flow of the project and that we have a reliable workplan; and
- Identify, discuss, and solve constraints within that pull planning session.
Now, this is where the magic starts to happen.
- Make sure that every trade partner has a different color sticky note. For larger projects, you may want to pre-order sticky notes that already have the trade partner’s specialty or name printed on them. You also need to have a space on the note for the trade partner to write the activity of their work, the duration in days, and the handoff or predecessor—the thing they need before they can start their work.
The handoff is crucial and often gets left off. This step is important because when you are pulling, no work can be released until the handoff is ready to go. For every card, there is a supporting card in the sequence, and you want them to match up.
- The facilitator needs to help the team think through the workflow. As the trades begin filling out their cards, the facilitator (often the project manager or superintendent) walks around the room and goes table by table to make sure trade partners have a good understanding of the activities they are putting on the cards and that it is the right duration to go along with the activity.
For example, you don’t want your electrical contractor to go into extreme detail about every home run they need for the project. You want the critical activities that handoff to allow them to start their work. So, to get their in-wall inspection, they must have their in-wall electrical conduit. To get their conduit, they must have the framing complete. So, you need a card for in-wall electrical rough-in with the handoff of framing or you will miss some sequencing in the pull plan.
- The facilitator needs to remind the team that the cards should have enough details on them to ensure they are easy to understand. The key here is that if someone who didn’t attend the pull plan session sees the card, that person would know exactly what it is. You may find trade partners wanting to shorthand a description or be vague and just say “in-wall” but not explain the detail of what type (i.e. electrical) or what area, etc. The details are critical to having the most effective pull you can.
- Make sure no duration is longer than 10 days. If they do, ask the Last Planners to break out duration into smaller scopes of work. For example, a painter may have on card that says “paint” and “30 days” and a handoff of “tape and bed.” You want to ask them to break the card up in some manner, say by Area A, Area B, and so forth. If the cards get longer than 10 days, there will be gaps in the scheduling process.
The Pull Plan Board
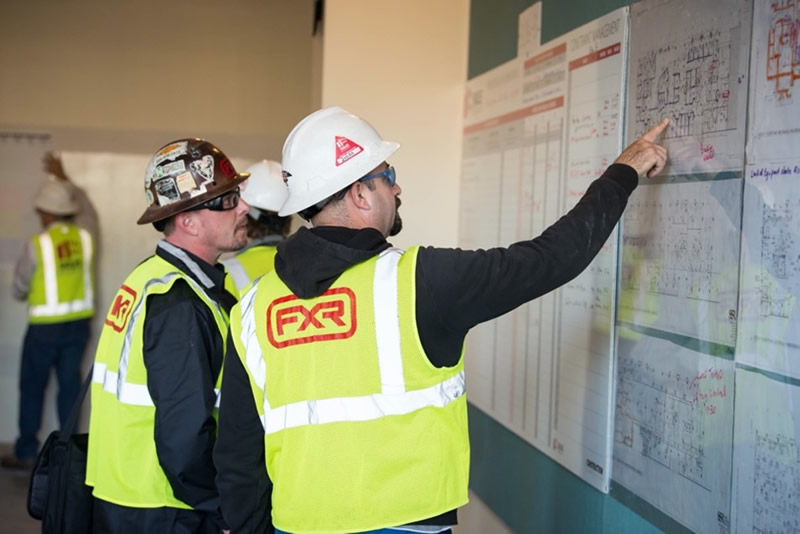
When the cards are all filled out, it’s time to make your way to the pull plan board.
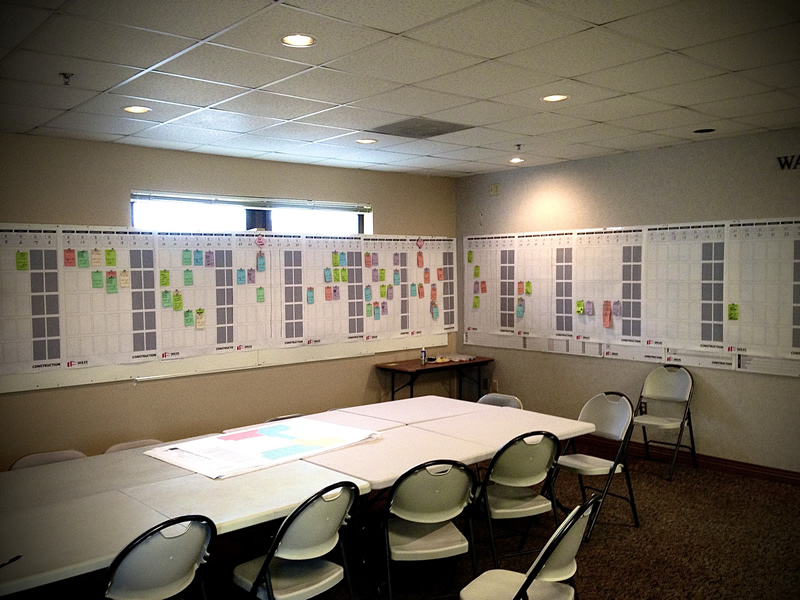
Before you start putting up sticky notes on the board, let’s talk about how your board should be organized. I’ll start by saying that many of these options are preferences and vary based on your project complexity, number of trades, and other similar variables.
- Calendar View: I like a calendar board as it makes things much clearer and easy to follow along. It also helps you see weekends and holidays better, so you don’t accidentally plan activities when no work is being done. When you are just getting started, regular plotter paper and store-bought sticky notes are perfectly fine.
- Duration Not Dates: At the top of the calendar view board, you will have boxes up top that are for the month and day of the month, but you don’t want trade partners to think about activities as dates. You only want to be thinking about the duration. Many times, you will want to leave the date fields blank so you can help your partners avoid a date-based mindset. Other times you may need to fill in the dates if you find your trade partners need more help in orienting themselves.
- Swim Lanes or Not: A “swim lane” is a grouping of cards by phase, area, or trade. For smaller projects, this may not be necessary. I like to use swim lanes to keep work separated by lane (especially by trade partners) as it can be easier for the trade partner or foreman to follow along.
- End Date Only: Put your sticky notes up on the end date versus every day of the week. For example, if you have a 5-day duration, there is not a sticky note for each of the 5 days and instead, it is placed on the 5th
With the board organized, it’s time to apply the sticky notes, validate handoffs, and check the schedule.
- Sequencing: When you are doing a pull plan for the first time, it’s okay to start at the beginning and work your way to the end. The key though is that once all the sticky notes are done, you must pull your way back from the end to the beginning to make sure all the handoffs match. You may read academics suggesting you only work backward, but this is builder’s Lean and based on my field experience on how to get trade partners working most effectively if they are new to pull planning.
(If you’d like a more concrete example, our Master Class video on this topic has a 4-minute video example that outlines a pull plan from “start finishes” back to “framing” that shows the step-by-step cards and the thinking behind the plan.)
- Small Groups: When you are doing a pull plan, you don’t need everyone in the room up at the board at the same time. I like to bring up trade partners in pairs or groups of three. For each grouping, the facilitator is always guiding them back in the schedule, ensuring that every card has a card, and looking at the overall duration of the scope.
- Cross-Check: So, if the pull plan shows you need 4 weeks to complete the phase, you then check against the master schedule. If the schedule also shows you planned 4 weeks, then you know you are on track. The activity and flow may look a bit different than your original plan, but with the pull plan, you have your trade partners’ commitments to this schedule.
Sometimes, the pull plan may beat the original master schedule with your trade partners confident they can deliver faster. That’s a concept called “team float.” You will want to keep the duration that you had originally in your master schedule, but you will build in float into the master schedule versus having float within each trade partner’s schedule.
Other times the pull plan may reveal that your trade partners are over schedule. If this is the case, you need to discuss with the team if there is a different or better way to do the activity (or phasing) and stay on schedule. If not, you need to plan on the next milestone you pull that you make up that time. It’s better to know months in advance that you have ground to make up.
Recap the Pull Planning Session
When the pull plan is complete, the last sticky notes are on the board, and you’ve walked back through the handoffs and durations, it’s time to recap.
- You want to go around the room to each trade partner to confirm that they understand the commitments that have been made, that they are validating them, and that they are on board and bought in to deliver so you can lock it into the schedule.
- You will also go through the constraint list or parking lot items that came up during the pull plan and commit to working through those as part of the general contractor team. The goal here is that by the time you get to the 6-week look-ahead planning, those constraints have been resolved.
Want to Keep Learning?
This blog post is a summary of one of the video lessons in our online training course, The Lean Builder Master Class. The Pull Planning training module includes seven videos that provide the background, tools, and tips to make your pull planning a success. Lessons include Push vs. Pull, Mock Pull Plan Example, Preparing a Pull Plan, Setting Up the Room, Running a Pull Plan Meeting, After a Pull Plan Meeting, and Stories from the Field.
In total, our Master Class offers 47 videos and 11 resource downloads to help you implement Lean on your job site. We invite you to learn more and join us on that journey with a free trial. Start today.
Be sure and follow Keyan Zandy on LinkedIn!
Related Blogs


