In this breakdown of the 8 types of waste in Lean, expert Lean Author Keyan Zandy delves into defects and rework and how to eliminate them from the jobsite.
8 Types of Waste in Lean
Learning about the 8 types of waste in Lean on a jobsite is an important step in your Lean journey, because the first step to overcoming waste is being able to understand and identify them.
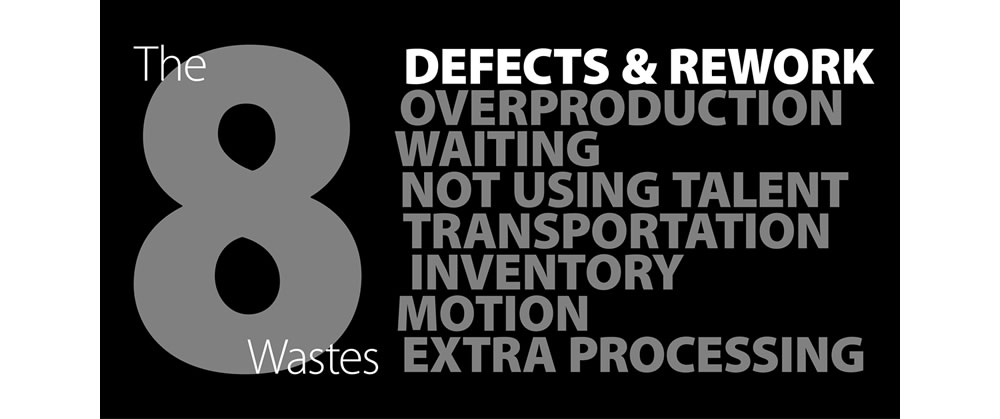
If you are not familiar with the 8 Types of Waste in Lean, let’s start with the basics. Waste is defined as any task that doesn’t add value. Unfortunately, many of the activities performed on construction projects are non-value added, or waste. There are several acronyms to remember what these wastes are; the one we used in our book, The Lean Builder, is DOWNTIME.
8 Wastes Acronym – DOWNTIME
DOWNTIME stands for the following wastes:
- Defects
- Overproduction
- Waiting
- Non-Utilized Talent
- Transportation
- Inventory
- Motion
- Excess
Learn more about all the Eight Wastes of Lean.
In this post, we are going to discuss the waste defects, to help you understand how find and eliminate this waste when it creeps up on your projects—and it will!
Materials that have been damaged or made incorrectly, or work that needs to be repaired, replaced, or redone due to mistakes are all known as the waste we call defects. Defects are a major problem on the jobsite because they lead to slow productivity, additional costs, and a frustrated client.
What the defects waste looks like on the jobsite
The defects waste is so prevalent on our jobsites that our industry uses a punchlist system just to track them. Poor fabrication, poor workmanship, poor sequencing, and poor inspections can all be described as defects on a project. Here a few examples of how the defects waste manifests itself:
- Poor fabrication – ductwork, that was made and sent out to the project that was not in accordance with the specifications.
- Poor workmanship – floor tile that was installed unevenly or in the incorrect orientation or with the wrong color grout.
- Inadequate sequencing – dinged up finished walls because the sequence of workflow was incorrect and other trades who were in the work area caused damaged due to ladders, carts, etc., moving around after the walls were painted.
- Poor inspections – missing anchor bolt locations, rebar sizes or placement, and concrete PSI mixes during a pre-concrete pour inspection which will cause chipping or reworking.
Why the defects waste is bad for your jobsite
Defects waste is dangerous because it leads to many of the other wastes. Any time there are defects in work in the field, they cost money and take time and manpower to correct. When workers are having to spend time dealing with defects, they are not adding value to the project. When dollars are being spent correcting defects in work, there is no value added to the project. The sooner you and your field teams learn about what defects are, how they occur, and the steps you need to proactively take to minimize this waste, the more efficient your jobsite will be.
How to get rid of the defects waste on your jobsite
Many of us in the construction industry are used to dealing with defects as they show up on QA/QC inspections, completion lists, or punch lists. The problem is, by that point, you are already in a reactive state and the damage has been done. The following steps detail a more proactive approach to minimize the defects waste from occurring on the jobsite in the first place.
Create a high trust environment:
The last thing you want on your jobsite is a culture where craftsmen are fearful to discuss any defects they see in the field. An example of this could be right before a concrete pour. If workers are worried about speaking up if they see something that doesn’t look right due to the fear of being blamed, ridiculed, or penalized they may stay quiet which could lead to massive amounts of rework involving time and money. However, if you train foreman and craftsmen to learn about impacts of the defect waste, reward/acknowledge trades for a low amount of punch list items, and create an environment where they feel comfortable calling out or reporting defects when they see them, the impact of this waste will be greatly minimized.
Preinstallation Meetings:
A pre-installation meeting is a great opportunity to make sure that your trade partners have reviewed specific concerns before work is installed in the field. On our projects, items specific to defects that are discussed at a preinstallation meeting could include:
-
- Submittal/Shop drawing note review – reviewing submittals and shop drawings with the installation team before work is put into place is a great way to prevent a defect from occurring in the field. Many times, our design partners add notes to these documents that may be missed by the workers putting the work in place.
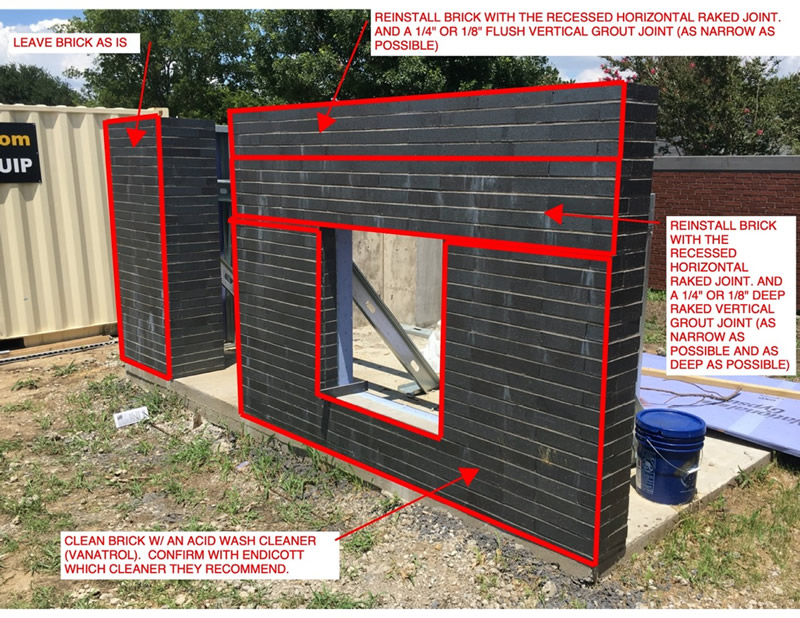
- Mockup Review – Mockups are a great way to avoid defects. Building mockups to coordinate installation sequence between trade partners, evaluate proposed design aesthetics, ensure construction details, or to test performance will minimize issues that can emerge when work is installed in the field. Look to utilize stand-alone mockups, in-place mockups and virtual mockups to decrease defects.
- Access – I’ve seen plenty of large materials ding up walls and doors as well as 18 wheelers run over freshly installed landscaping because access was not discussed. Make sure workers can get to a space to install the work without damaging other work.
- Environmental Control – Is the building completely dried in? Is air on? Have materials had time to acclimate? These are good questions to ask so that defects don’t occur before the building is ready.
Track/Check project deliveries:
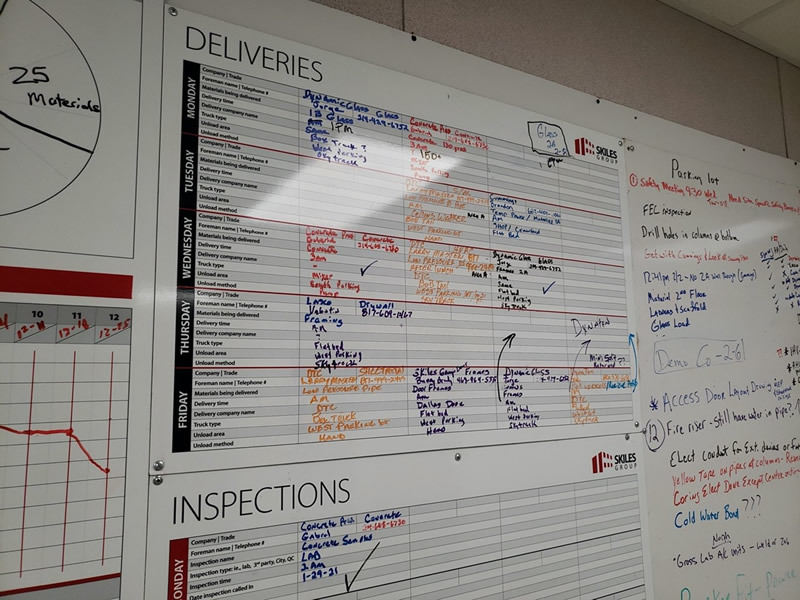
A material delivery board is a great way to monitor materials as they come into the jobsite. By knowing what is coming onsite each day you can develop a process to inspect materials as they are delivered. This will allow you to send back material that is either incorrect (wrong product) or has defects (warped, dinged up, broken). By catching the faulty materials early, you will not have to deal with the further wastes involved after installation, such as excess processing (trying to correct defects), non-utilized talent (having craft workers spending time on repairing defects), or transportation (sending defected material back to the supply house or shop).
How to Identify the 8 Types of Waste in Lean
Here are a few tips learned over the years to help teams learn to see the waste:
- Look for it every day – Morning huddles and toolbox discussions are ripe opportunities to teach last planners about defects waste. Encourage your foremen and “boots on the ground” to come to the daily huddle meeting ready to report on any defects waste they have identified and if they were able to resolve it.
- Be accountable for it – As in most cases in the field, visual communication is key. Try making an Eight Wastes board and post in the job trailer or jobsite for yourself and/or your trade partners and field leaders to see on a continuous basis. When items come up, add a person’s name who is responsible for removing or reducing the waste. The more your trades are empowered and held accountable for waste reduction, the more efficient your jobsite will become.
- Eliminate it. Waste can suck the life and morale out of a jobsite culture. It’s disrespectful and will consume valuable resources that would be better utilized in an effective and productive manner. As LCI puts it, “It’s the enemy of good construction.” Make it your personal mission to be relentless against the wastes that you see on your jobsite, even if you’re not the CM/GC. Control what you can control—others WILL recognize it and behaviors WILL
If you have a good tip you would like to share on how to learn to see waste or would like to share an Eight Wastes of Lean story from one of your projects, please let us know in the comments below!


